How to upgrade AmpedSense

Periodically I will release new versions of the AmpedSense plugin. Upgrading your existing installation is easy, and I’ll show you how now.

Steps

  1. Login to wordpress admin, and click on the ‘Plugins’ menu item in the left sitebar.
  2. From the list of installed plugins, find the AmpedSense entry and click ‘Deactivate’.
  3. Once deactivated, find the AmpedSense entry again and now click ‘Delete’
  4. Confirm that ‘yes’, you do want to delete all files. Don’t worry, your settings and ads will still be saved. You will not lose your ad recipes or stats.
  5. Once deleted, reinstall the plugin with the new version you have the same way you installed it before.


Deleting AmpedSense

To upgrade, simply delete and install the new version


Enjoy your new version of AmpedSense!

How to get the Best AdSense CTR

I’ve spoken a lot on this site about choosing the best colors, best placement, and best sizes for your AdSense ads.

Yet a big question remains – how do you know which of the options for each of these work the best? I’m not talking about just taking suggestions. I mean how do you *really* know for sure that you’ve chosen the right position, size, and colors that are going to give you the best click through rates (CTR)?

The answer: Split testing.

What is split testing?

Split testing means showing visitors different versions of your site and keeping track of which ones are working the best. The traffic is essentially split into equal proportions and all site versions are shown in parallel throughout the data collection period. This is also know as “AB testing” because you are comparing version A with version B.

Let me explain with an example. Pretend we have designed a new logo for our site, but we’re not quite sure everyone’s going to like it. If we split tested, we could show half of the visitors the site with logo A, and the other half the site with logo B. Then we’d keep track of certain metrics – such time on site and orders placed – and when the day was over we’d compare stats to see which one performed the best. Then we’d pick the winner and make that the permanent logo.

It’s important that the test versions be shown at the same times (but to different visitors). If you show one version on Monday, and the next version on Tuesday, your results will be inaccurate (there could be drastic daily differences, in addition to environmental conditions that affect your traffic day by day – even hour by hour). Instead you need to split the traffic throughout the day.

At 8:46 visitor 1 sees version A.
At 8:47 visitor 2 sees version B.
At 8:48 visitor 3 sees version A.
Make sense? This is what we call testing in parallel.

Split testing ads

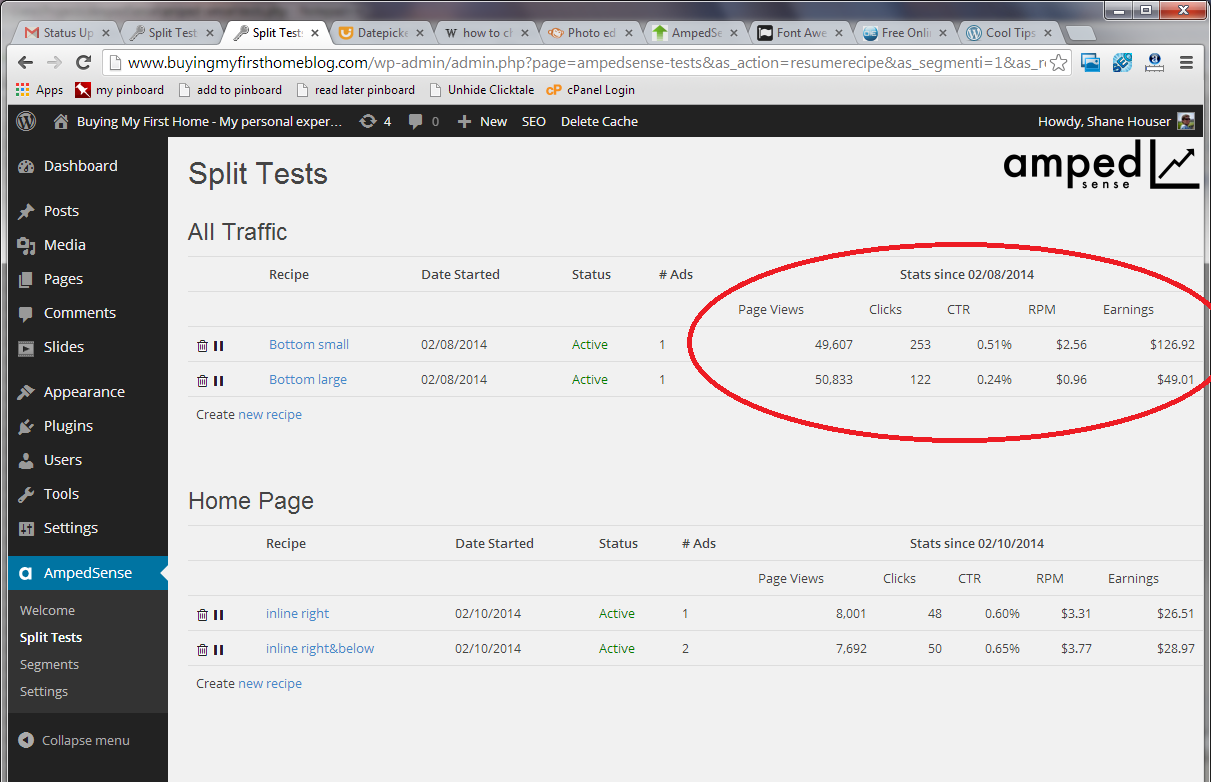
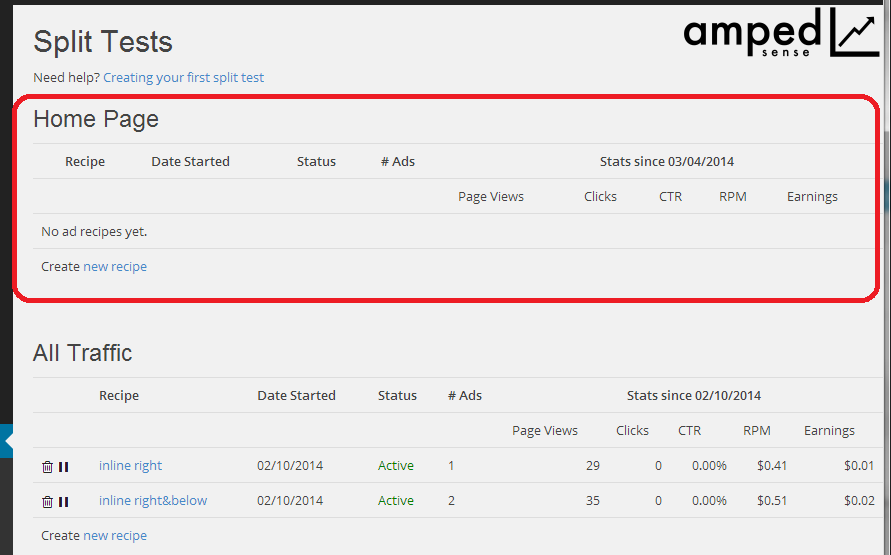
We can apply this same strategy to split test our ads to see which ones bring in the most revenue for us. We’ll show part of our traffic Ad 1, another part Ad 2, and the rest will see Ad 3. AdSense makes it very easy see the difference in performance between ads since they keep a lot of reporting data we can use to make decisions.

When you split test ads, it’s very important that you test in parallel instead of changing your ads over time. Ad performance heavily influenced by external factors outside your control (such as day of week, advertisers, even time of day), so you’ll make the wrong decision if you keep switching your ads yourself. Look at this example of my AdSense revenue for one site over a week:

Spike in AdSense earnings

You can see that if I had tested one ad on Saturday, and then a different ad on Sunday, I would have incorrectly concluded that the Sunday ad performed a million times better. But in reality there was no change in ads and my traffic was the same – perhaps there was a new advertiser dumping money into Google.

How to split test

You typically have three options to set up AdSense split testing on your wordpress site.

1) Use AdSense Experiments
Google created a feature in AdSense that allows you to split test ads. It’s relatively simple if you’re just going to be testing size and ad type, but trying to test multiple ads or different positions is not possible. That’s a bummer because that’s typically where you’re going to see your biggest increases. Read more about it here: https://support.google.com/adsense/answer/4599562?hl=en

2) Program a random split tester
If you know how to code PHP, it’s not terribly difficult to create a little script that will rotate your ads for you. But again, it can get increasingly complicated as you want to try different positions, quantities, etc.

3) Use a WordPress plugin
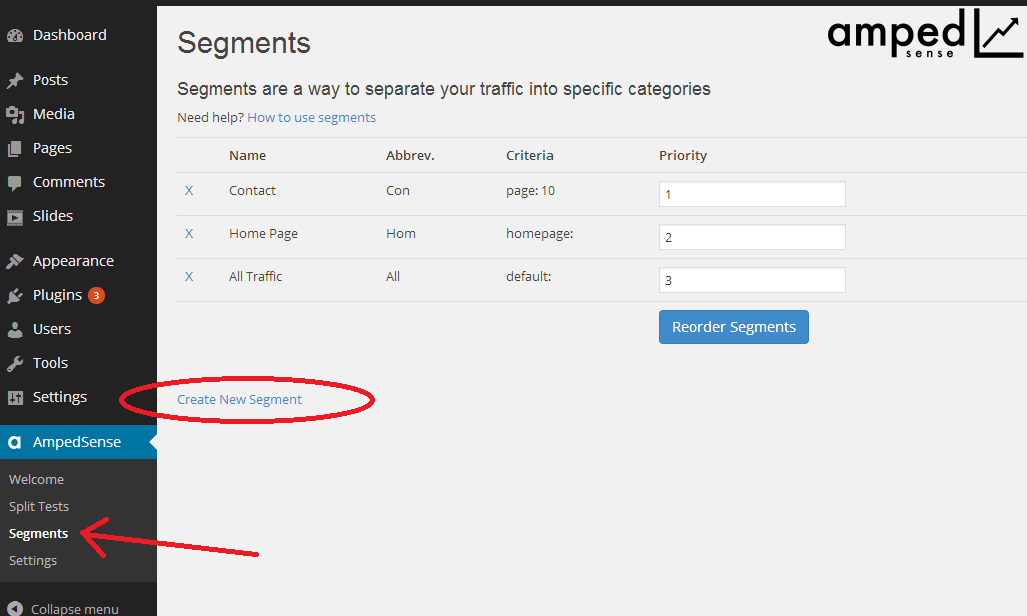
Wordpress has a slew of plugins out there. Searching from within your admin you’ll find plugins that help you inject adsense ads, and other plugins that help you rotate content to be split tested. The bad news is that there are currently no plugins that will allow you easily split test AdSense accurately, while keeping track of their stats.

Which is why I created a plugin that solved all my problems.

I was sick of having low AdSense earnings. Annoyed at tiny click-through-rates. Furious at miniscule RPM’s. And even more bothered that no one had created a solution like this already. So I took matters into my own hands and developed something that changed all that.

You can put something like this together if you know how to write WordPress plugins, understand the AdSense API, and have a few days to spare.

But if you’re like most entrepreneurs, you don’t. Your time is valuable. I realized this after a few people started asking me about sharing my custom built plugin with them.

So I’ve decided to put it up for sale, and would love to see you experience many of the same successes I’ve had with this plugin in your websites. Accurately split testing your AdSense ads and keeping precise stats so you know for a fact which ones bring you the most income – it’s something you’re going to wonder how you lived without.

Grab the plugin today for just $59. There’s no monthly cost, and I back it with a 30 day moneyback guarantee. There’s absolutely no risk to you.

PS. Be careful of some of the free WordPress plugins out there. In the past people have been known to swap out your advertiser ID with their own, meaning they’re getting paid for your clicks instead of you (nasty!)

What is the Best AdSense Placement for a WordPress Blog?

When most people install AdSense onto their blog, they place it wherever their theme forces them to. Some themes are lucky enough to have widgets to let you choose a few positions, but others don’t. This restricts how much you’re able to earn from AdSense because it may not be the most profitable position. Your theme designer doesn’t know what location is going to give you the most clicks, nor does he care – he just wants it to look pretty!

Luckily I have tested countless sites with different AdSense configurations, and I’ve uncovered a few patterns. But don’t follow this advice blindly – it’s always a good idea to test the ad position yourself to see which will give you the highest click-through-rate, resulting in the most revenue for you!

Where to place my ads?

There are a million places you can put your ads, and they may look alright, but not all of them are ideal for earning money. If you actually want people to see the ads and potentially click on them, I’ve found the best performing positions are within your content. Not in your header, or your sidebar. Not next to your logo or hidden underneath anything – but inside your articles!

Here are the positions I suggest you try for your wordpress site:

  • Above your article
  • Inside your article
  • Below your article

And here’s what each of those looks like:

Above your article

AdSense above your post

Inside your article

AdSense inside your post

Below your article

AdSense below your post

Why does this work?

Putting ads inside your content allows you to utilize the perfect balance of getting your visitors to see your ads, without annoying them. You’re not blasting 3 ads in every corner of your site, but you’re also not hiding them so no one sees them. What’s great about this position is that it’s a win-win for you and your traffic. You get more clicks, and your visitors are still able to read your site without their eyes bleeding from ads.

Case Study

Need proof? Take a look at this chart. It shows the results of testing 5 different positions against each other. The clear loser? The sidebar. Everyone ignores the sidebar. I’ve learned this to be consistent in all the sites I’ve helped optimize.

Results from split testing AdSense positions

Amongst the other ad positions, we were testing two ads inside the content (justified to the left and right), one above, and one below. By looking at the earnings column you can see that the ads placed above and below brought in the most money at a little over $20. Which is better? Also consider the click through rate (CTR). In the long run, a CTR of 1.32% is going to give you over a 50% increase in clicks compared to a CTR of 0.85%, so for this website placing ads directly below the articles is the ideal spot.

Try Split Testing

The only way you’re going to know which of these works the best is if you AB split test them. If you know how to program, then you don’t need my assistance here. Otherwise, consider using a plugin like AmpedSense to split test your ads to find the optimal configuration that gives you the highest CTR.

Here’s how to set up this set of tests in AmpedSense. When creating a new ad recipe to test, note the ‘Ad Position’ option:

AdSense Location Field

Clicking on it will reveal every ad position available:

AdSense Placement Options

I suggest trying a split test with at least 3 different ad positions that naturally fit within your blog. Let the test run for a week (or less, if you get more traffic), and you’ll be able to see which one is the best for you!

Every site is different!

Every website has a different audience, theme, color scheme, and layout – and you never know which ad position is going to work the best for you. That’s why I always suggest testing your AdSense placement on your own site. Not only will you be maximizing your AdSense earnings, but sometimes you’ll find out that the best performing position is not the most annoying – resulting in a placement that both you and your visitors are happy with!

What are the Best AdSense Sizes for a WordPress Blog?

When most people install AdSense onto their blog, they use whatever sizes fit into their theme by default. But your theme designer doesn’t know which AdSense size is the most profitable! It’s a good idea to always test the ad size to see which will give you the most clicks, resulting in the most revenue for you! Another important point is that not all advertisers run ads in all sizes. If you’re limiting yourself to a specific ad size that doesn’t have a lot of advertisers, you’re missing out on AdSense earnings! Look at all these sizes!

  • 300 x 250 – Medium Rectangle
  • 336 x 280 – Large Rectangle
  • 728 x 90 – Leaderboard
  • 160 x 600 – Wide Skyscraper
  • 320 x 50 – Mobile Banner
  • 970 x 90 – Large Leaderboard
  • 468 x 60 – Banner
  • 234 x 60 – Half Banner
  • 120 x 600 – Skyscraper
  • 120 x 240 – Vertical Banner
  • 300 x 600 – Large Skyscraper
  • 250 x 250 – Square
  • 200 x 200 – Small Square
  • 180 x 150 – Small Rectangle
  • 125 x 125 – Button
  • 728 x 15 – Horizontal Large (Link Unit)
  • 468 x 15 – Horizontal Medium (Link Unit)
  • 200 x 90 – Vertical X-Large (Link Unit)
  • 180 x 90 – Vertical Large (Link Unit)
  • 160 x 90 – Vertical Medium (Link Unit)
  • 120 x 90 – Vertical Small (Link Unit)

With so many sizes, it’s tough knowing which is ideal!

The Recommended Sizes

Luckily Google specifies the first 5 in that list as “recommended.” The reason they’re most recommended is because a lot of advertisers design ads for those sizes instead of others. This means you’ll get the most competition on your site – resulting in the highest cost per click!

  • 300 x 250 – Medium Rectangle
  • 336 x 280 – Large Rectangle
  • 728 x 90 – Leaderboard
  • 160 x 600 – Wide Skyscraper
  • 320 x 50 – Mobile Banner

Here’s an example of each of those sizes within a wordpress blog:

300 x 250 – Medium Rectangle

300 x 250 - Medium Rectangle

336 x 280 – Large Rectangle

336 x 280 - Large Rectangle

728 x 90 – Leaderboard

728 x 90 - Leaderboard

160 x 600 – Wide Skyscraper

160 x 600 - Wide Skyscraper

320 x 50 – Mobile Banner

320 x 50 - Mobile Banner

Why do these sizes work the best?

The reason they’re most recommended is because a lot of advertisers design ads for those sizes instead of others. This means you’ll get the most competition on your site – resulting in the highest cost per click!

Think about it. If you pick an obscure size that fits perfectly with your custom theme, there may only be 100 advertisers that have created ads for that size. But if you pick one of the more common sizes, there could be 100,000 advertisers that are actively paying for ads of that size. More advertisers means they have to outbid each other (kind of like eBay), which means more money for you!

Case Study

Need proof? Take a look at this chart. It shows the results of split testing two different ad sizes against each other. A small 468 x 60 Banner and a larger 728 x 90 Leaderboard:

Results from split testing AdSense sizes

Not only does the larger ad get more clicks (almost 2x as much), check out the RPM (revenue per thousand views) as well – over 4x the improvement! This exemplifies what we just discussed, a recommended size having more competition (and thus more earnings) than a typical ad.

Try Split Testing

The only way you’re going to know which of these works the best is if you AB split test them. If you know how to program, then you don’t need my assistance here. Otherwise, consider using a plugin like AmpedSense to split test your ads to find the optimal configuration that gives you the best CTR.

Here’s how to set up this set of tests in AmpedSense. When creating a new ad recipe to test, note the ‘Ad Size’ option:

Creating a new ad recipe in AmpedSense

Clicking on it will reveal every ad size there available:

Choosing an ad size to test in AmpedSense

I suggest trying a split test with at least 3 different ad sizes from the “recommended” list that naturally fit within your blog. Let the test run for a week (or less, if you get more traffic), and you’ll be able to see which one is the best for you!

Every site is different!

Remember the point I made about advertisers using different ad sizes? Also keep in mind that every topic has a different set of advertisers, so no one ad size is going to work the best on every site out there! Every website has a different theme, color scheme, and layout. That’s why I always suggest testing your AdSense sizes on your own site. Not only will you be maximizing your AdSense earnings, but you can rest easy knowing you’re not missing out on lost income!

What are the Best Adsense Colors for a WordPress Blog?

When most people install AdSense onto their blog, they use the default colors that Google has picked. But Google doesn’t know how your website looks, or what colors your visitors respond to best. It’s a good idea to always test the ad colors to see which will give you the most clicks, resulting in the most revenue for you!

Consider these color options:

I’m aware there are thousands of colors in the rainbow. And each AdSense ad has various elements that can be different colors:

  • Ad headline
  • Ad text
  • Ad url
  • Ad border
  • Ad background

This leaves you with so many options you’ll never know which is the best set of colors to use! But don’t worry, for most blogs you only need to try 3 different sets:

A. Match your website


Make everything blend in with the colors of your blog. Use the same background and action colors, text colors, and borders. Some people don’t like to do this because it could trick the user into thinking they’re clicking a link on your site (instead of an ad), but it typically has a high success rate.

B. Stand out from your website


Grab your visitors attention by not blending in to your current blog’s theme. People will most likely realize it’s an ad, but they’ll also be looking at it, which is good.

C. Use Google’s Defaults


Google is run by advertising geniuses who have tested thousands of colors in order to pick the ones that work the best overall. Don’t underestimate their defaults – they are solid contenders.

Case Study

Check out the results of a test I performed where I tried the three color combinations above over the course of a week:

Results of split testing AdSense colors

Close call, huh? 😉

How awesome is that – the ad that has colors that match your site blew the others out of the water. Even better than Google’s default (which proves that I’m smarter than Google, right?? Haha). 17 clicks vs 2 clicks is hugely different – I’ll take a $7 RPM over a <$1 RPM anyday! Let the money start rolling in with this 7x increase in earnings!

Try Split Testing

The only way you’re going to know which of these works the best is if you AB split test them. If you know how to program, then you don’t need my assistance here. Otherwise, consider using a plugin like AmpedSense to split test your ads to find the optimal configuration that gives you the best CTR.

Here’s how to set up this set of tests in AmpedSense…

First recipe testing similar colors:


Second recipe testing different colors:


Third recipe testing Google’s default colors:


Start these tests, wait a couple weeks (or quicker if you have lots of traffic), and let the results tell you which is the best!

Every site is different!

There are people out there that claim they know the best color combination for any site, but I find that hard to believe. Red always catches attention? Green always makes people happy? Blue always means hyperlink? That’s all bogus.

Every website has a different theme, color scheme, and demographics (for example, women respond to colors differently than men). That’s why I always suggest testing your AdSense colors on your own site. Not only will you be maximizing your AdSense earnings, but you can rest easy knowing you’re not missing out on lost income!

How to set up Integrated Reporting

NOTE! Integrated Reporting now comes standard on all AmpedSense installations. This article no longer applies to recent AmpedSense functionality.


Integrated Reporting allows you to see your stats from AdSense within wordpress. By default it’s off and you have to click through to Google’s site to see your reports, but once enabled it’s all integrated within AmpedSense, making it super easy to make decisions about your split tests.

integrated reporting

Step 1: Turn it on

Turn it on. Go to the AmpedSense Settings menu. Click Enable Integrated Reporting.

Step 2: Generate Google Client Credentials

Next you need to specify your Google Client Credentials. These allow third party apps (such as AmpedSense) to access limited data from Google. Here’s how to generate them:

a. Go to the Google Cloud Console and create a new project. Name it ‘AmpedSense’, and leave the project ID as the default.

b. Click on ‘APIs & auth’, then toggle on the ‘AdSense Management API’ services.

install2-new

install3-new

c. Click on the Credentials menu, and hit Create New Client ID under OAuth. Choose ‘Web Application’ as the platform, and then copy the redirect URI from the AmpedSense wordpress settings screen and paste it into the redirect URI here. Hit ‘Create Client ID’ button and you’ll be shown a screen with the values we need. Copy the client ID and client secret from here back into the AmpedSense wordpress settings screen. ‘Save’ in AmpedSense and you’re done!

install4-new


install5-new


install6-new

Step 3: Save

Click save.

install7-new

You’re done!

Now just go to look at your split tests and click the link at the top that says ‘Pull data from Google’

Video Tutorial

Watch this video for a demonstration of the steps above:

How to use Segments

  • Want to put some ads on your home page, and different ones on your other pages?
  • Want to prevent ads from showing on a specific page?
  • Or want to have responsive ads show for your mobile traffic?

AmpedSense achieves all of that through a feature called ‘segmenting’. Segmenting is a way of dividing your traffic up into smaller groups (‘segments’) which you can then have custom settings for. Let’s walk through how segmenting works.

How segmenting works

Luckily segmenting is pretty easy, only 2 steps.

First, create a new segment by clicking on the ‘Segments’ menu in the AmpedSense wordpress sidebar. Here you’ll see a list of all segments. There will always be an ‘All Traffic’ segment which will run your ads by default. Click ‘Create new segment’

segments menu

You’ll be presented with a simple form to name and choose the criteria for your segment. You can pick what traffic you want this segment to represent.

Devices to target:

  • All Devices
  • Desktops & Tablets
  • Tablets & Phones
  • Desktops
  • Tablets
  • Phones

Content to target:

  • All pages
  • All posts
  • Home page
  • Specific page
  • Specific post
  • Posts in category

Once you’ve saved it, you can reorder its priority. AmpedSense will start at the top of the list and stop as soon as the traffic meets the condition in the criteria. The ‘All Traffic’ segment should always be last, otherwise it will catch your traffic before it has a chance to check others.

Second, you’ll need to add ads to run on this segment (or don’t if you want this segment to not receive any ads). Go to the Split Testing screen and you’ll see a new area for your segment. Just create ad recipes for it like you have been for All Traffic before!

segment new

Some example scenarios

Place specific ads on all posts (not pages)

1. Create a segment for ‘All devices’ and ‘All posts’

2. Reorder segments so this segment has the preferred priority.

3. Create split tests for this new segment.


Don’t show ads on a page

1. Create a segment for ‘All devices’ and ‘Specific page’, and pick the page you want to exclude.

2. Reorder segments so this segment has the top priority.

3. Don’t add any ad recipes to this segment.


Use responsive ads on posts for mobile traffic

1. Create a segment for ‘Phones’ and ‘All posts’

2. Reorder segments so this segment has the top priority.

3. Create split tests for this new segment by creating responsive ads

Hiding segments

There are some segments that you’ll never want ads to appear on. For those, you can toggle whether or not you’re testing them so that they don’t show up in your reports. Simple hit the link that changes the Testing from ‘Yes’ to ‘No’:

segmenttoggle

Placing AdSense Ads in the WordPress Sidebar

One of the greatest features of AmpedSense that not many split testers allow you to do is inject your AdSense ads into the sidebar of your wordpress site. It’s really easy to do!

2 Steps

1) After downloading and installing AmpedSense, login to your WordPress site. From the Appearance-> Widgets screen, find the “AmpedSense Sidebar A” widget in the list of available widgets. This widget acts as a placeholder for you to put your ads. Drag and drop that widget into your sidebar container.

You’ll notice that there’s also a “AmpedSense Sidebar B” and “AmpedSense Sidebar C.” This gives you the ability to test multiple positions on your sidebar, if you wish to try a top placement vs bottom, or left vs right sidebar.

addsidebarwidget


2) Simply create your AdSense split test, and specify “AmpedSense Sidebar A” as the ad location.


Bonus: Since these ad positions are set by a widget, you are not limited to using them in just sidebars. If there’s another area of your site (perhaps, footer?), you can drag and drop the widget to the desired location and test with that custom location!

How To Install AmpedSense

Follow these instructions to install AmpedSense into your WordPress site:

1. Download the latest copy of AmpedSense.

2. Then choose either of the two installation methods:

a. Using the Upload Manager in your WordPress Admin:

i. After logging into your wordpress admin, click Plugins -> Add New.

ii. Find the link at the top to ‘Upload’, then click ‘Choose file’ and locate the .zip file that was provided to you.

iii. Click the ‘Install Now’ button, and the plugin will automatically be installed!

iv. From the installed plugins screen, choose to ‘Activate’ AmpedSense

b. Uploading via FTP:

i. Login to your site with an FTP client

ii. Within your WordPress installation, browse to the ‘/wp-content/plugins’ directory.

iii. Unzip the contents of the .zip file provided, and transfer the ‘amped-sense’ folder.

iv. Login your wordpress admin. From the installed plugins screen, choose to ‘Activate’ AmpedSense.

3. Once the plugin has been uploaded and activated, you’re ready to create your first split test

Minimum Requirements

An installation of WordPress 3.5 or greater

Video Tutorial

Watch this video for a demonstration of the steps above: